We’ve been working hard behind the scenes to give our mobile apps and web maps a big refresh with new technology and modern map features. Find more fish with the latest conditions, high-resolution charts, and smarter planning tools built for offshore anglers.
- Hone in on subtle temperature breaks and rips that hold pelagic gamefish
- Add waypoints to target specific offshore zones, and share with your buddies to work together on the water
- Loop through images to stay on top of breaks and rips as they shift and move
- Built for offshore reliability while you’re out on the water without cell service
What’s New in SatFish v2.0
By narrowing the display to specific temperature and color ranges, you can focus your search on the most productive water for your target species and quickly eliminate less promising areas. This adjustable scale is very useful for honing in on subtle breaks and fronts that can be difficult to identify when temperatures vary widely across a region. Here’s how to use it:
Step 1:
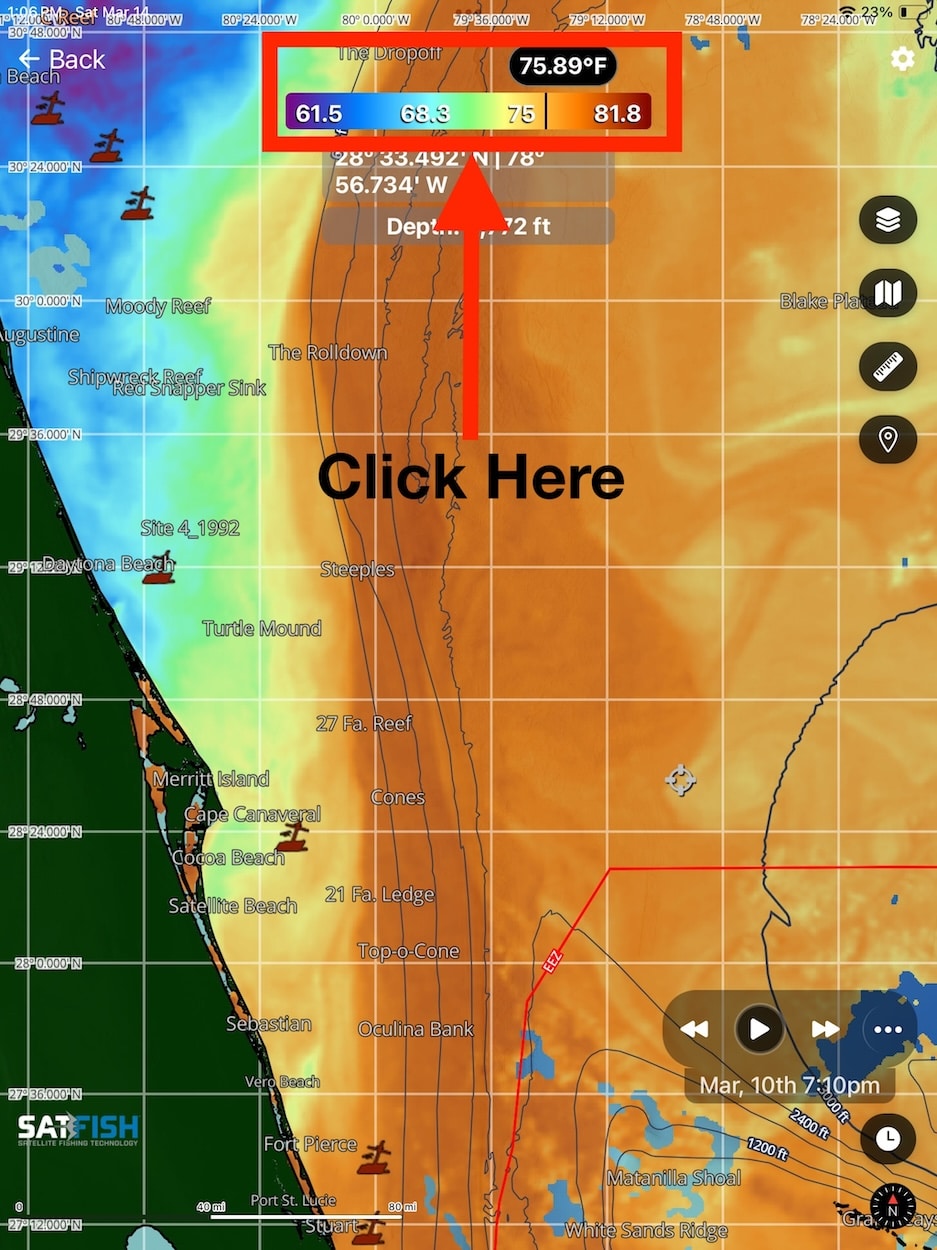
Tap on the scale bar at the top of the map window.
Step 2:

Enter your desired range by typing values into the minimum and maximum boxes or by adjusting the slider. If you’d like to view a previously created range, click the “Previous” tab at the top of the Temperature Range pop-up menu.
Step 3:

Once the desired temperature/chlorophyll range is input, click “Apply” to display the range on the map.
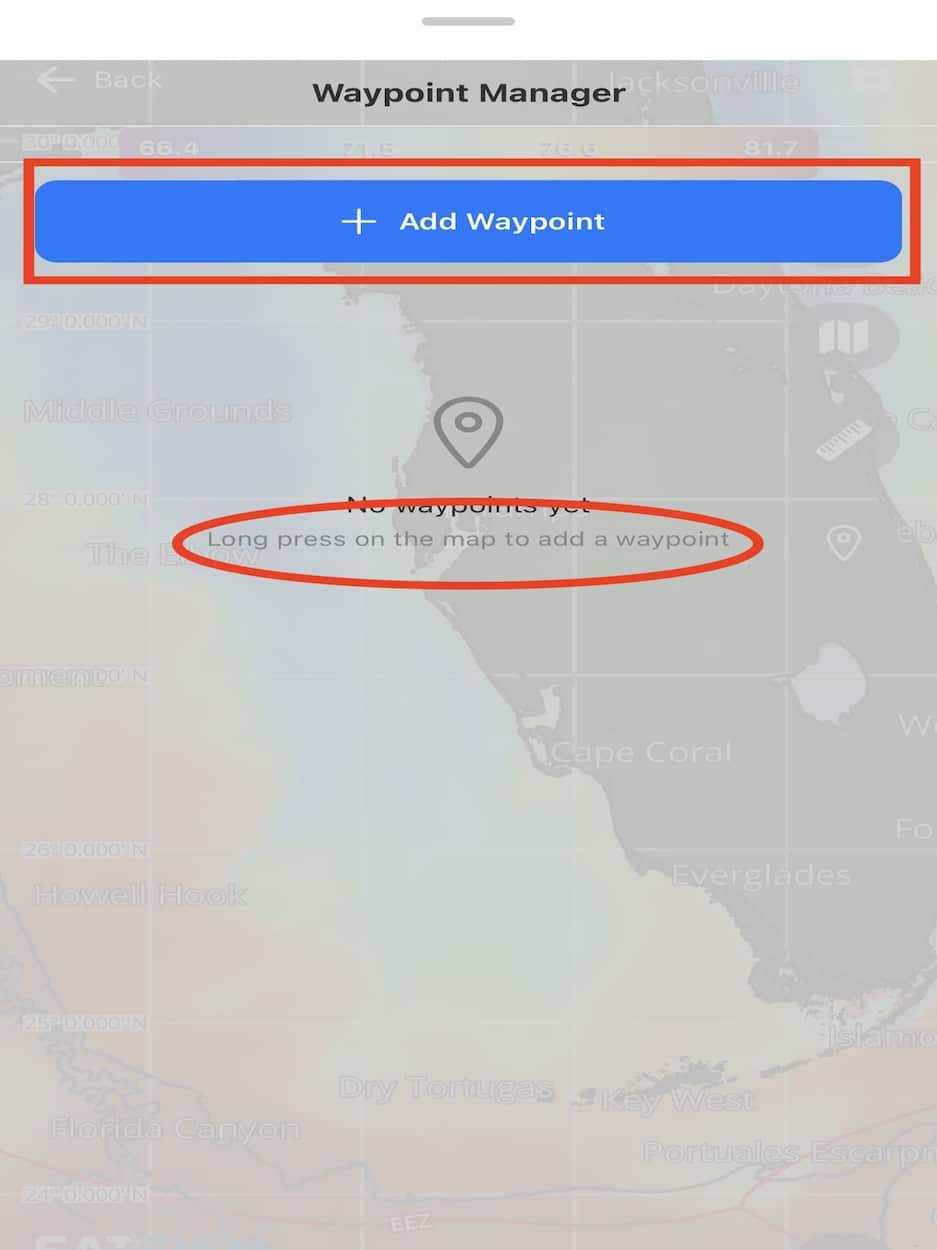
Adding your own waypoints is great for marking temp breaks, eddies, and other key features you want to target on your trip. You can also use it to save your own “honey holes” and private GPS spots, making it easy to return to productive areas and build a personalized library of go-to fishing locations over time.
Step 1:
To add a waypoint, you can long-tap anywhere on the map or open the Waypoint Manager using the folded map icon on the right side of the screen and choose “Add a Waypoint.”
Step 2:

GPS Waypoint:
If you’re on the water, you can use the “GPS” option to create a waypoint at your current location, just like the MOB button on your chartplotter.
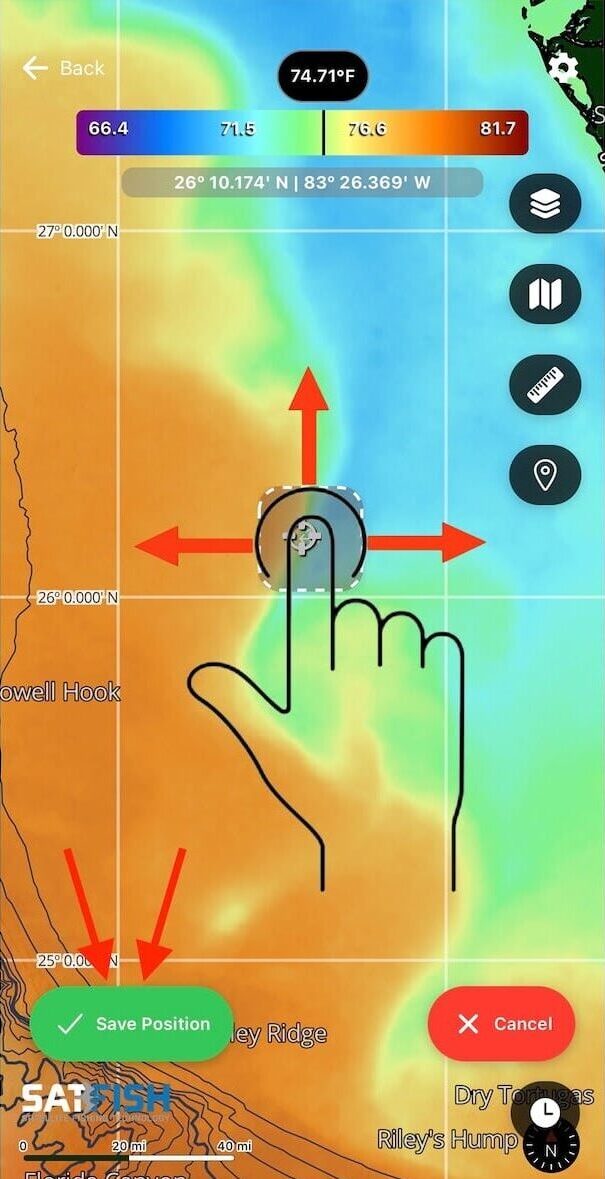
Custom Waypoint:
To add a waypoint anywhere on the map, use the “Custom” option. You’ll be able to fine-tune the location you would like on the map, as shown below in step 3.
Step 3:
Click and hold while dragging the cursor to adjust the desired location of the waypoint. Once the waypoint is in your desired location, select the green “Save Position” button on the bottom left of the screen. You can add a name and description you would like the waypoint to show.
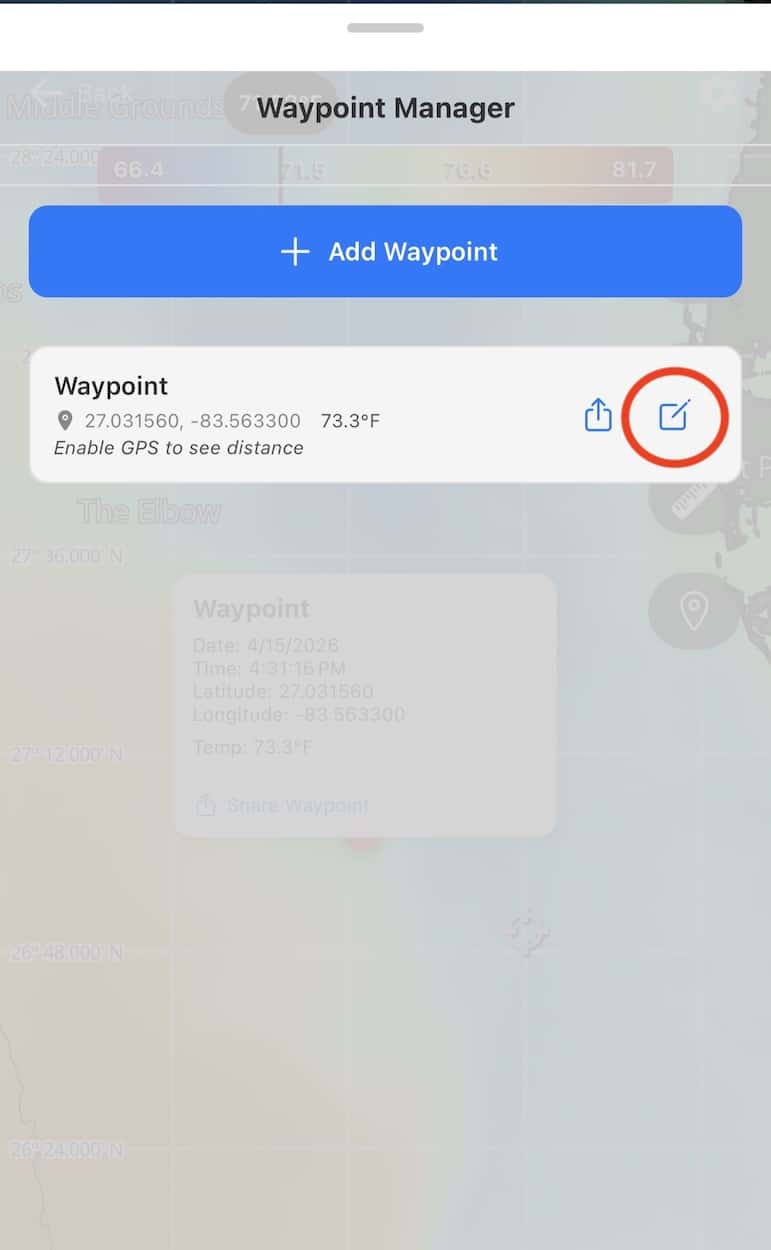
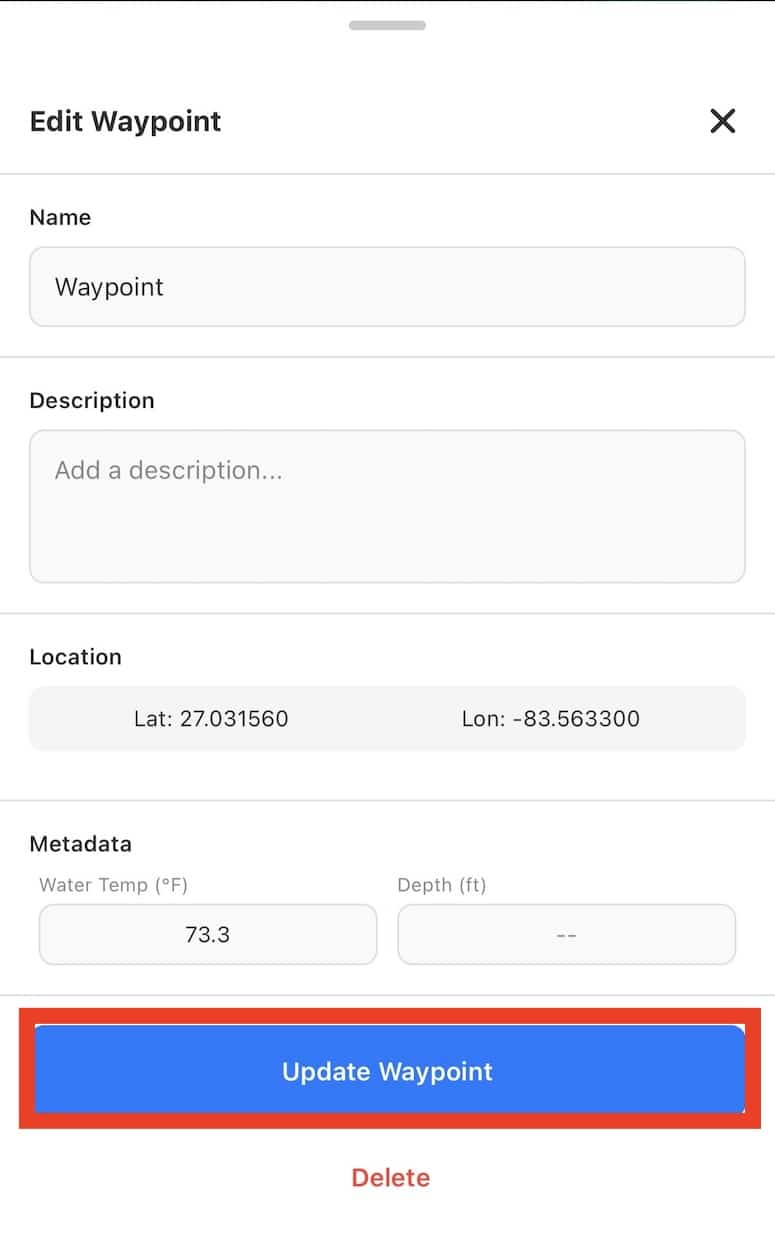
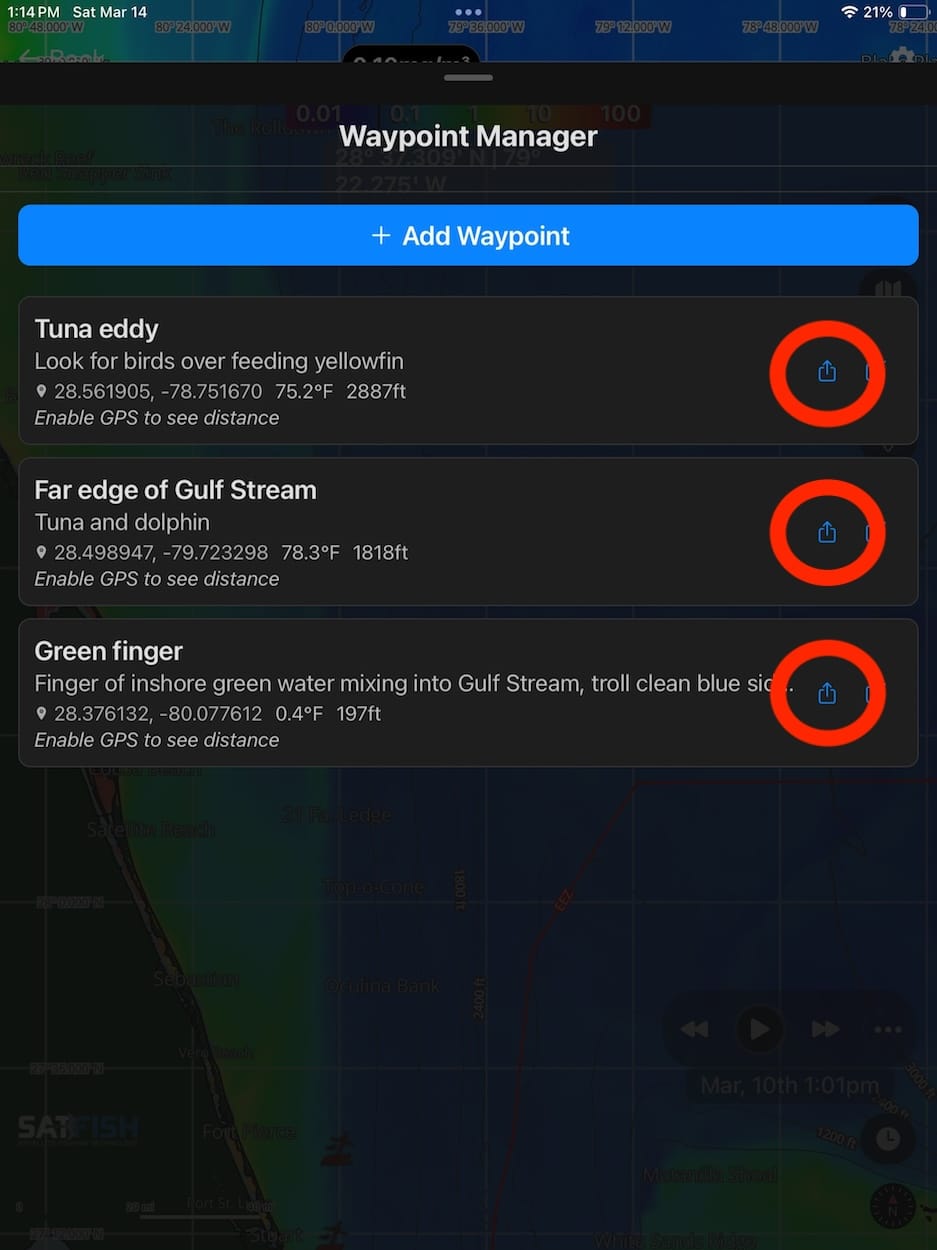
Edit and Delete Waypoints
Open the Waypoint Manager by tapping the map icon on the right side of the screen. Once the Waypoint Manager menu appears, click the edit button on the waypoint you would like to edit. From there, you can update its details or permanently delete it.
Share Waypoints
Step 1:
To share a waypoint, open your saved waypoints and tap the Share icon, or tap a waypoint directly on the map and select the “Share Waypoint” from the pop-up.
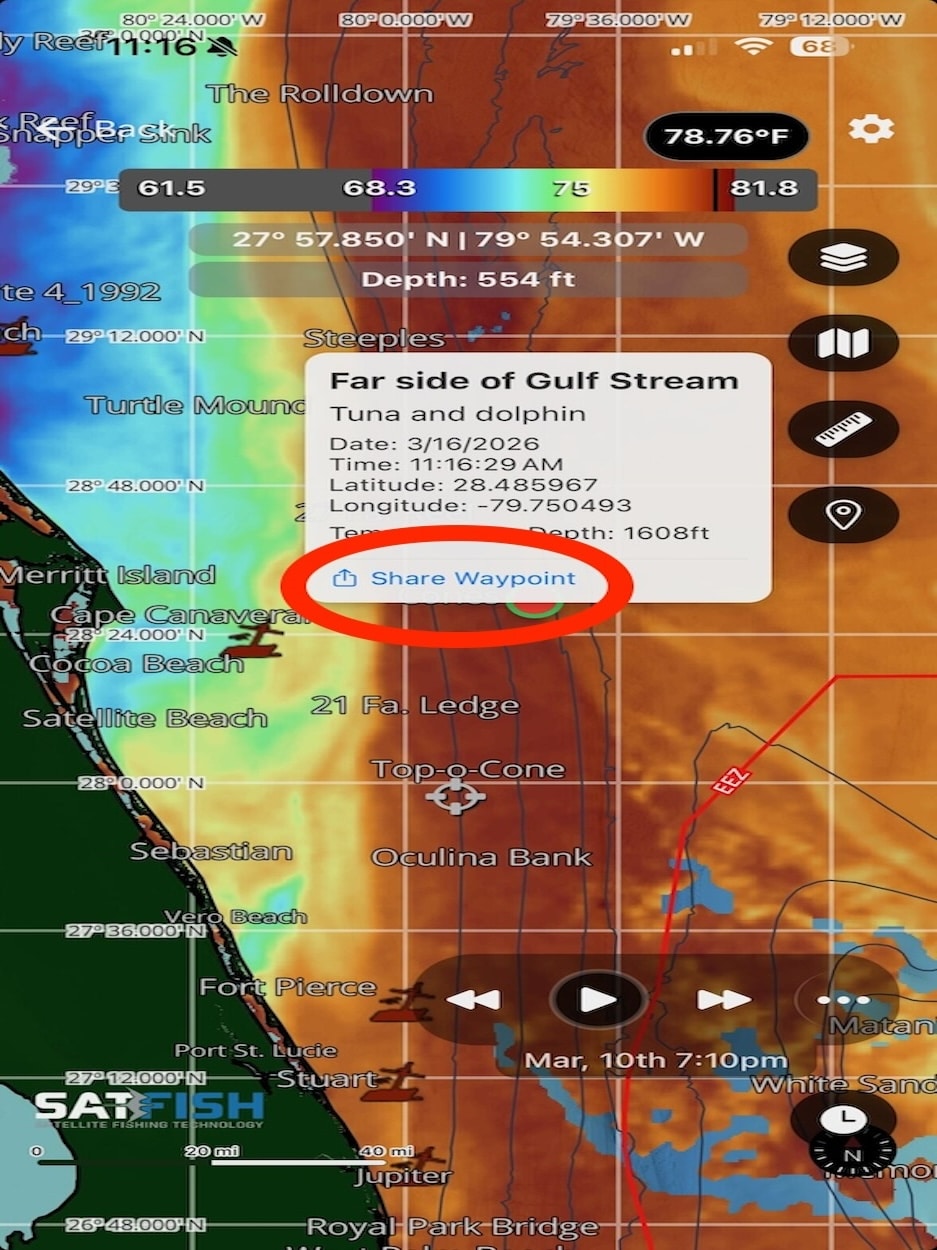
Step 2:

Share your waypoints with friends or yourself by copying the link and sending it via text or email.
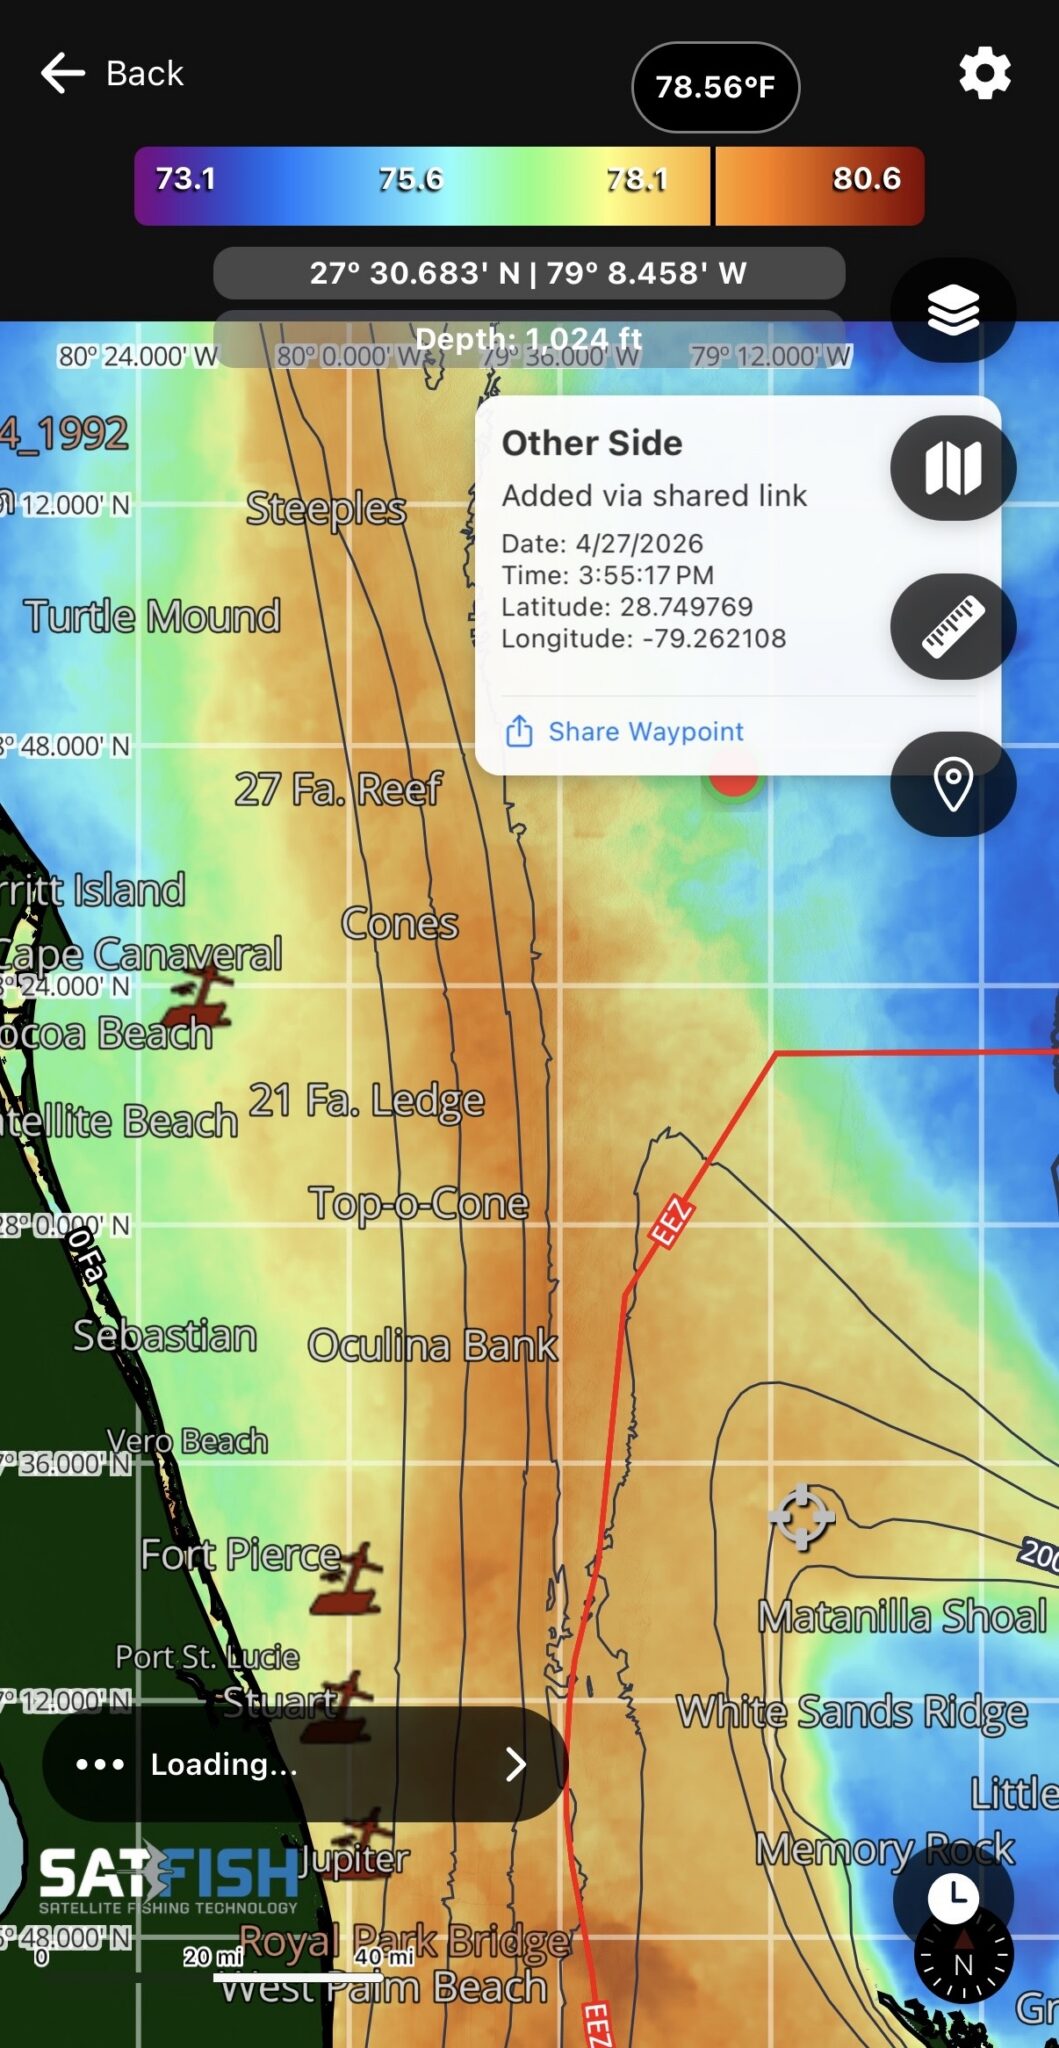
Receive Waypoints
Step 1:

Did you get a text or email from your buddy with a spot to check out? Great! Start by tapping the link in the text/email to open a preview. It’s got a link to install the SatFish mobile app, if you haven’t already. We recommend logging into the app before trying to add a shared waypoint.
Step 2:

Tap the “Open in SatFish app” link from the map preview.
Step 3:

Tap “Add” when prompted to “Add Shared Waypoint” to add it to your map.
Step 4:

Open the region where the waypoint was shared. You’ll now see the shared waypoint(s) in that area, along with your own waypoints displayed as large red dots.
Step 5:
Click the waypoint (large red dot) to see the name, description, and other information of the shared waypoint.
This is a great planning tool for mapping out your next move before you even leave the dock. It allows you to measure distance and heading between points, helping you build a game plan, estimate run times and distance, and line up your approach to key areas like temp breaks or structure.
Step 1:

Click the ruler icon to measure the distance and heading between two points.
Step 2:

Adjust the endpoints of the measure tool by pressing and dragging the endpoints to the desired locations. This will show the distance, in nautical miles, and heading from end point 1 to end point 2.
When enabled, this tool will allow you to measure distance from your exact GPS position. This will also give you the heading to the point that you set. On the water and want to know the distance to the next temp break, fishing locations, or even going back to the dock? This is the tool to use! Here is how to use it:
Step 1:
Enable the Distance and heading from your GPS position by clicking the the balloon icon. This will show your GPS location on the map.
Step 2:
Once enabled, your GPS location will appear as a blue and white dot with a dashed line extending from it. You can adjust the line’s distance and heading by tapping your desired location on the map.
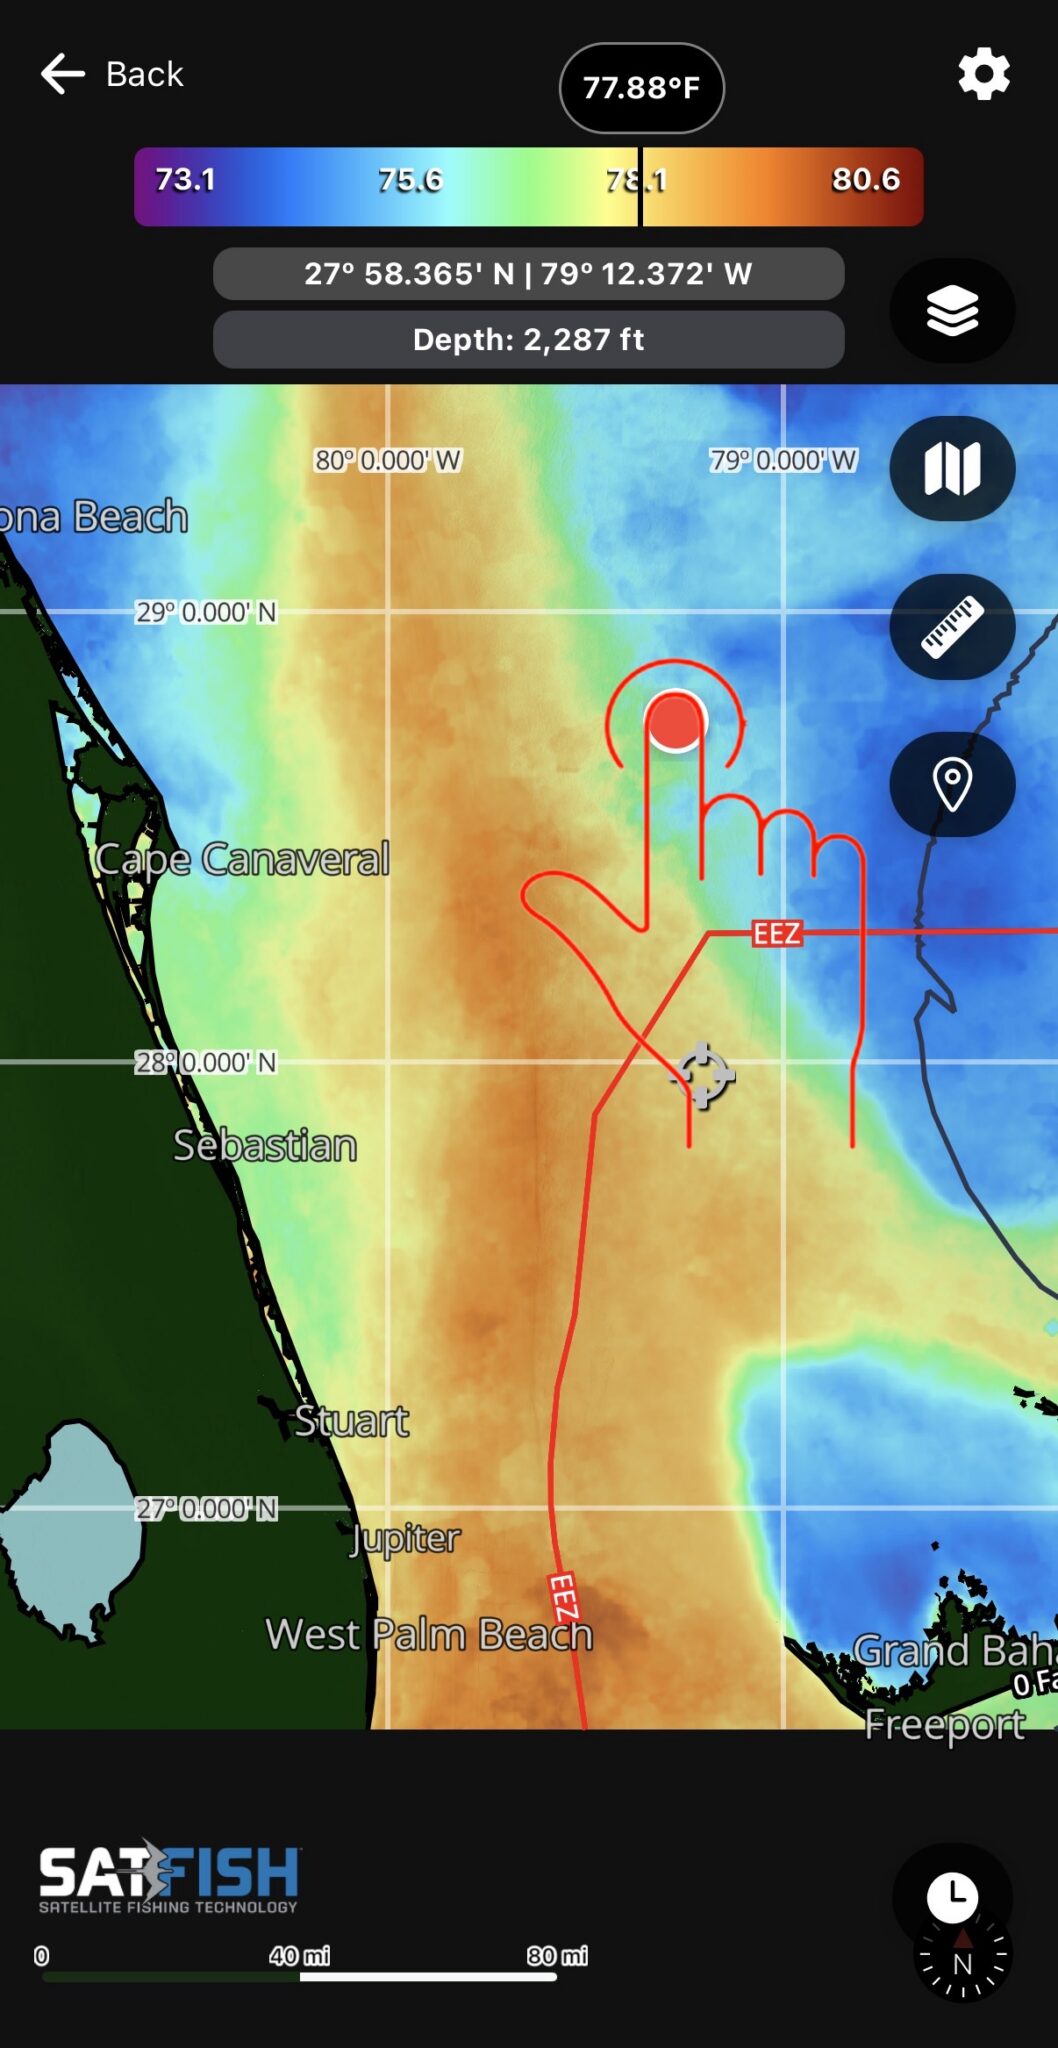
The new SatFish interface is built to move with you with effortless zoom, fluid scrolling, and a cleaner layout that lets the water speak for itself. Slide across breaks, zoom into subtle temp changes, and scan structure without interruption. Follow the breaks without fighting your screen.
No clutter or delay. Just clear, responsive control.
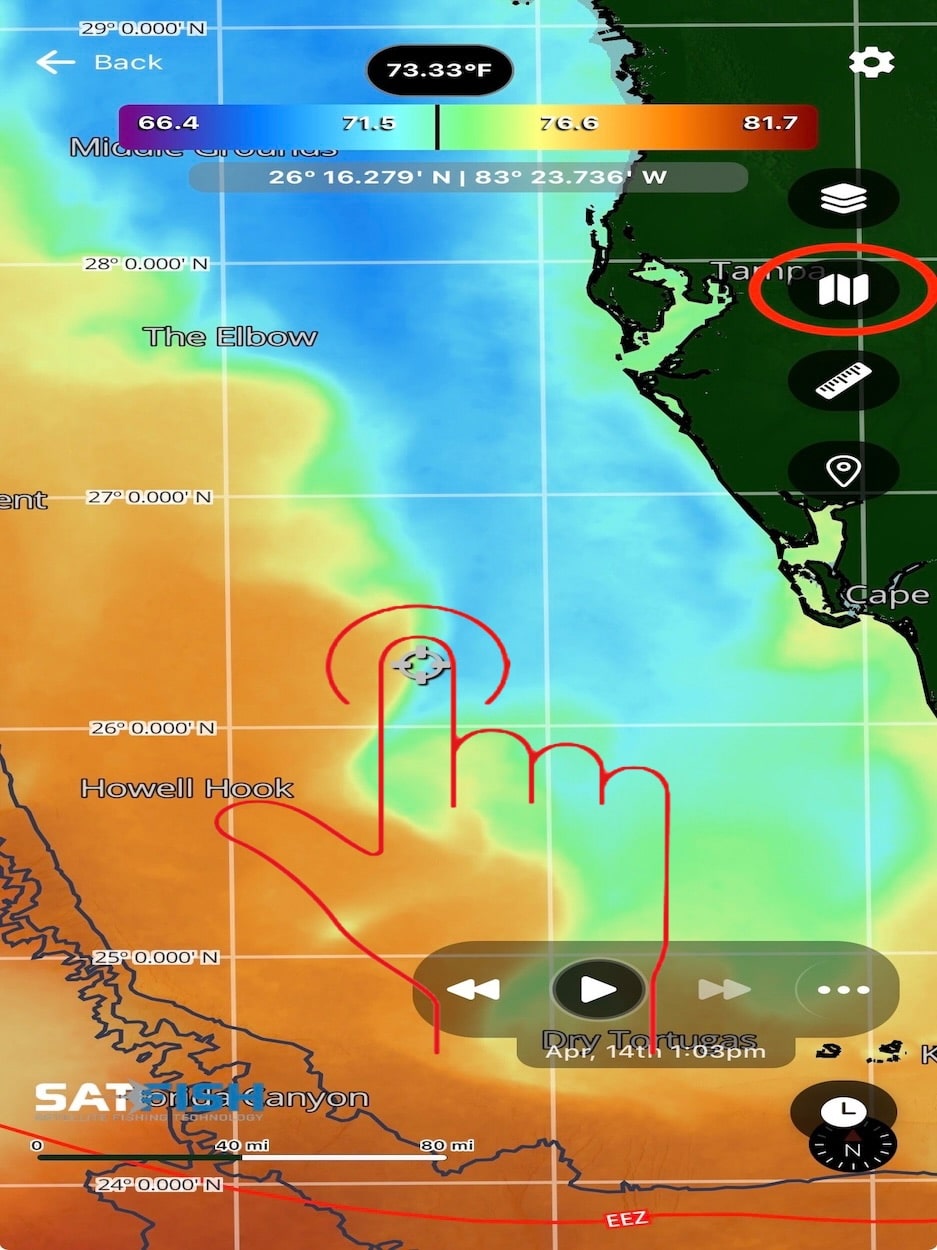
Use two fingers to pinch-zoom in and out on the map and rotate it around. As you zoom in, more details show up on the map (spot labels, bathy contours, loran TDs, etc.)
Zoomed Out:

Zoomed In:

Map Rotation and Reset to North-Up

Drag the map with two fingers in a circular motion to rotate the map anyway you choose to get the best reading of breaks, eddies, measuring distance, etc.

To reset the map to north-up orientation, click the compass icon in the bottom right corner of the map window.

When loading a region, all the latest satellite imagery and data automatically get cached (saved) to your device, along with a full 7-day history of high-definition sea surface temperature (SST) maps.

To cache the history of other layers, simply view those other layers while online (Ocean Circulation Currents or High-Def Chlorophyll concentration, for example), and the full 7-day history will automatically save to your device for offline use.
If you view a map layer offline that you hadn’t viewed online, you’ll still have the most recent image for it available for use – you just won’t have the 7-day history available until you view that layer type while back online.
That’s it! No need to hit a download button, take screenshots, or remember to save anything manually – it’s all automatic and based on what you view during your normal use of the maps.
The History Playback feature is great for reviewing past conditions, finding the best image coverage, and tracking how temperature and current breaks move over time so you can better predict where fish will be. Here is how to use it:
Step 1:

Tap the clock icon in the bottom right corner of the map window to expand the history playback controls.
Step 2:

You can advance backward and forward through the last 7 days of the images using the double-arrow left and right buttons, or loop through all images automatically using the single-arrow play button.
Step 3:

To view the thumbnails previews and timestamps of the full 7-day history, tap the “…” button to expand the history menu.
Step 4:

Drag the menu slider down to close, and tap the clock icon again to close the playback controls.
You can change the format of the GPS display under the scale bar. The different formats include;
- DD MM.mmm’
- DD MM’ SS”
- DD.ddddd.
Here is how to change the format:

Click the GPS display under the scale bar. This will rotate through the display options with each click.
Changing the map layer units is useful because it lets you view data in the format you’re most comfortable with. Whether it’s switching between the Imperial or Metric system, it makes the information easier to read quickly and accurately, especially when comparing conditions or making decisions on the fly. Here is how to change the units:
Step 1:

To access the settings, where you can change the map layer units, click the gear icon in the upper right corner of the map window.
Step 2:

If you would like to see the map layer units using the Imperial system (F, ft, and mi), turn the Imperial Units toggle button on. This toggle button will be shown as green when the Imperial Units are showing on the map.
Step 3:

If you would like to see the map layer units using the metric system (C, m, and km), turn the Imperial Units toggle button off. This will show as grey when metric units are showing on the map.